Hello to you all…
This is our first blog and I would like to introduce myself. I’m Cheryl and I’m the designer and owner of Superior Stencils. Our Superior Stencil Story of how we began can be found on our HOME PAGE under the heading “Our Story”.
 I’m so excited to finally begin!
Each month I will discuss subjects from… How to order the right size stencil, Tips & Tricks to Stenciling, How to create new board shapes, and then do a Q&A session addressing any questions you may have.
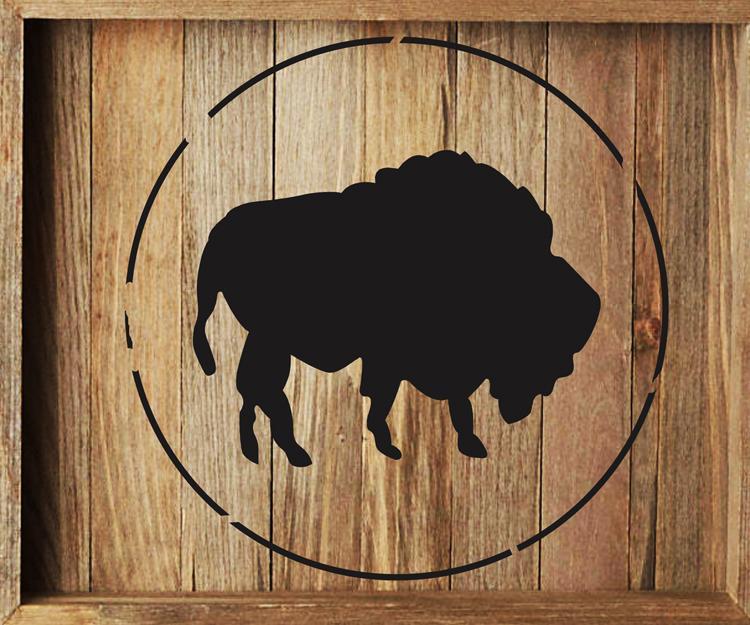
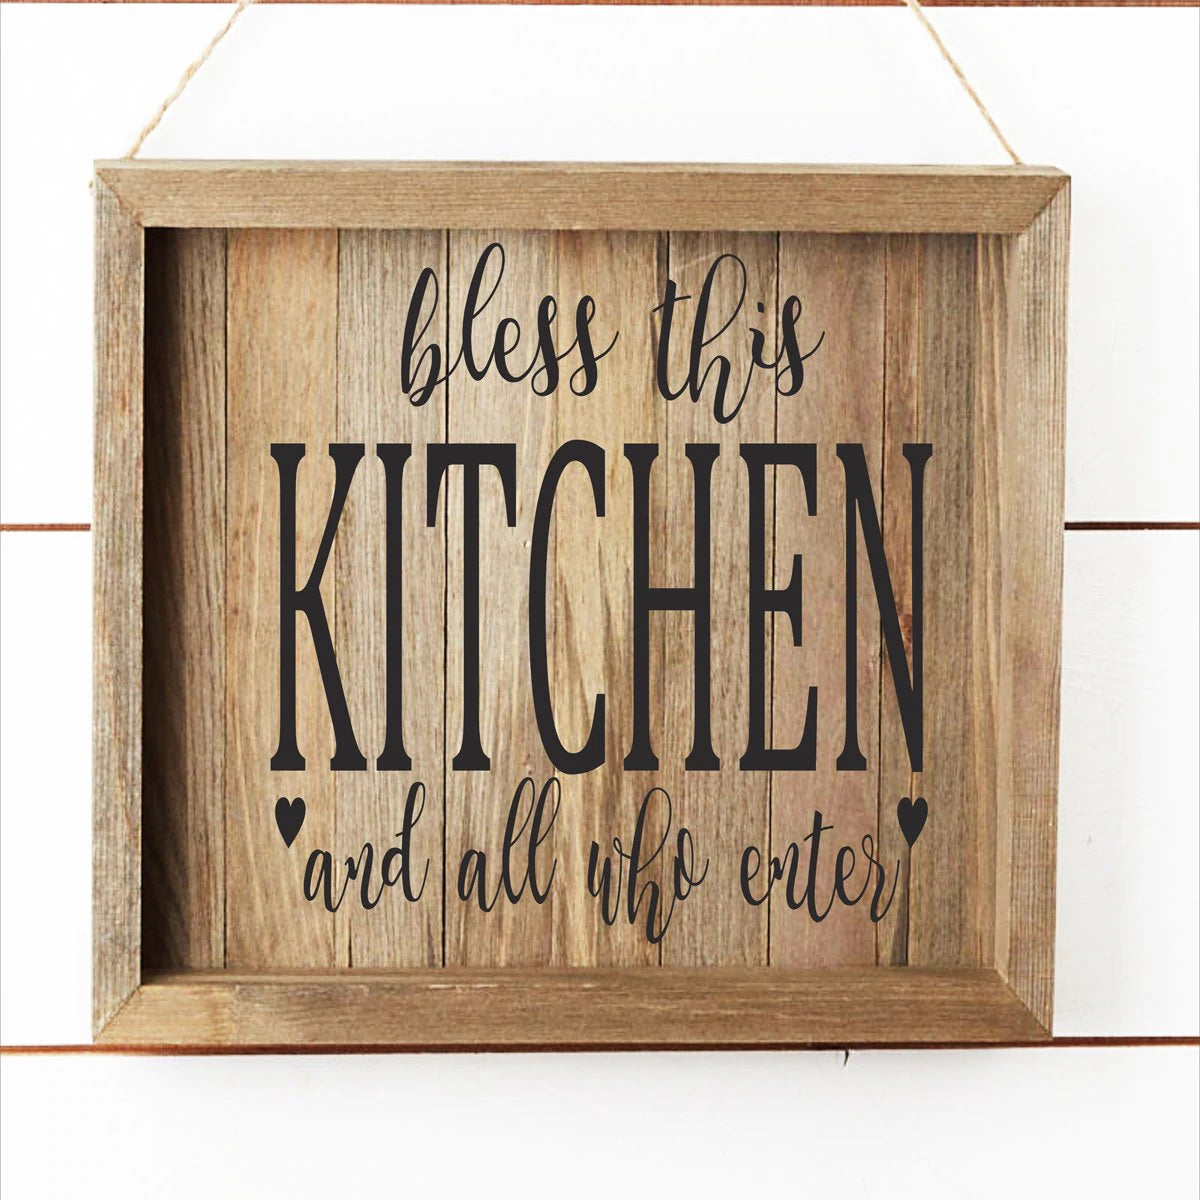
In this first blog I’d like to add some photos for those who do not know what a Stencil is. After all not everyone is familiar with stenciling and how FUN it is to create something unique using stencil designs.
We use two mylar (thin flat plastic sheets) thicknesses to cut our designs onto. After they’re cut the stencil becomes a pattern that can be painted onto Wood, Fabric, Walls, Tiles, Pottery, Glass … well you get the idea! Our designs can be painted onto just about any material as long as it’s a flat clean surface.
Both grades of mylar are reusable and if cleaned and stored flat they can last for many uses which is very cost effective. And as a girl on a budget I’m all about saving money!


The 7 mil thick mylar (1st photo) is blue and very flexible. Normally we use this for Alphabet Stencils. The 10 mil thick mylar (photo #2) is opaque and somewhat stiffer so this is used for Tile Stencils and other multi-use designs.
One of the most common questions is, how do we create a stencil design. First we start with our art program, (the brains of our business) along with my brain, which designs everything we offer. The art program then shares that information with our Laser, the muscle of our business. It does all the hard detailed cutting using an industrial laser beam which is truly amazing to watch!
I will add a brief video to show exactly how it works so you can see that the laser is a true laser beam that cuts through the material at a high degree temperature which sometimes can leave residual outline of the gride the mylar lays on while being cut on the back of the stencil, but this does not hamper the stencil in any way. All lines are crisp and clean making a perfect design.
Once the design is cut I pick out all the pieces that remain inside the stencil leaving a perfectly cut design as in this photo. The detail is amazing!
I’ve cut the tiniest designs that I could never cut by hand and am blessed to have my laser. I named her BIG BLUE and keep her maintained like most people maintain their cars.
All our stencils are cut-to-order as we keep no stock in our studio so, as soon as an order is received we schedule the ship date and start cutting then wrapping each order carefully and always include STENCIL TIPS or TILE TIPS with each order to help our customers complete their project with confidence.
I’m always available to answer questions if someone gets stuck so it’s like having me there to help from start to finish. I remember the first time I stenciled a sign I was terrified and of course made mistakes of using too much paint on my brush. That is the #1 mistake most commonly made. After a LOT of practice I got it and you will too.
If you’d like to see our STENCIL TIPS they are listed on our websites HOME page at the very top under STENCIL RESOURSES.
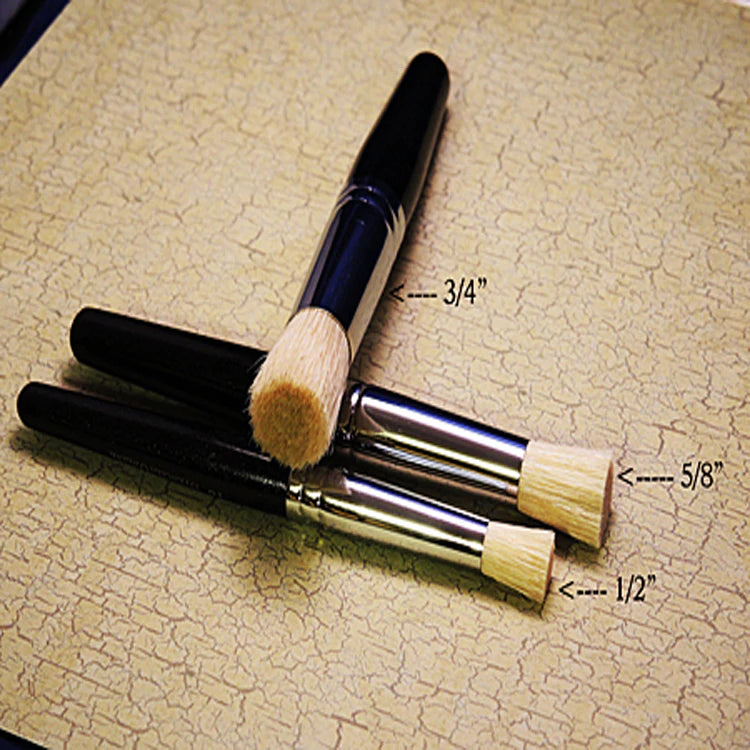
One last thing before I go, I struggled to find a good Stencil brush when I first started and finally found the PERFECT Stencil Brush! I sell these in our store and profit only $1.00 per brush. Am I crazy, well yes I am! I know just how hard it is to find a good stencil brush and your project will only look as good as the materials you use so I’m sharing the knowledge so you won’t go through the frustration like I did.

Our Brushes are available to purchase on our websites HOME PAGE under POPULAR STENCIL COLLECTIONS. You won’t regret buying these great brushes!
Well it’s time for me to say goodbye for now my honey’s home and I’d love to say hello and close the studio for the day. Until next time God Bless you & yours- Cheryl/superiorstencils.com